
A leaking or difficult-to-disassemble SS OW Tee requires more than wiping the body and tightening the nut. You will be able to identify the flow path, isolate the circuit, inspect the tubing and ferrules, remake the connection correctly, test for leaks, and decide when replacement is safer than repair.
Key takeaways
- Confirm the SS OW tee drawing, port arrangement, tube size, threads, and flow direction.
- Isolate the circuit and verify zero pressure before loosening any tube fitting.
- Cut, deburr, clean, and fully insert the tube before remaking the tee connection.
- Leak-test at controlled pressure and check every replacement against supplier documents.
Identify the SS OW Tee and Its Flow Path Before Disassembly
Confirm the fitting from the manufacturer’s drawing before removing it: “OW” is not a universal designation and may mean one-way, offset, or a proprietary configuration. Check the port arrangement, tube outside diameters, wall thickness, thread form, flow arrows, and connected components. Do not infer flow from the external shape.
| Fitting | What it indicates | Identification before disassembly |
|---|---|---|
| Equal tee | Three joined ports of the same size | All port sizes match; no directional arrow |
| Unequal tee | Branches with different port sizes | Record each port and tube outside diameter |
| Union | Two tubes joined end to end | Two inline ports, not a third branch |
| One-way tee or tee assembly | Flow controlled through an internal passage | Check for arrows, a spring, poppet, cartridge, or valve body |
Trace the circuit from source to outlet and mark every tube before loosening a nut. A one-way tee can direct flow through an internal passage, while an equal tee only joins three ports. Photograph the installed arrangement and compare it with the drawing, piping schematic, or manifold layout.
This prevents reversing a gas or hydraulic connection or fitting a visually similar tee with the wrong port arrangement. Record these details in the ss ow tee maintenance log.
Isolate, Depressurise, Clean, and Inspect the Complete Connection
1. Before SS OW tee maintenance, identify the gas, hydraulic, electrical, pneumatic, and mechanical energy sources. Close both upstream and downstream isolation valves, apply lockout and tagout, and verify the isolation.
2. Vent the trapped section to a safe location, then purge it when the gas hazard assessment requires purging. A gauge reading of zero does not prove that gas is absent from a tee, dead leg, regulator, valve cavity, or blocked tube. For hydraulic service, control stored pressure and capture fluid safely.
3. Clean the complete connection with a service-compatible, lint-free method. Keep chloride-bearing cleaners from drying on stainless steel; chloride residue, stagnant moisture, and deposits can cause pitting and corrosion. Stainless steel tee care includes investigating recurring staining instead of polishing only its visible mark.
4. Inspect the tee body, ports, threads, sealing surfaces, ferrules, and tubing beside the fitting. Look for cracks, pitting, corrosion staining, galling, dents, cross-threading, vibration marks, fretting, circumferential scoring, ferrule bite damage, ovalised tubing, and signs that the tube supports the pipework.
5. Replace the fitting for a cracked body, damaged ferrule, severe thread damage, or persistent leakage. Cut damaged tubing back to sound material rather than covering it with a new tee. Oxygen service requires an approved oxygen-cleanliness procedure that excludes hydrocarbons, fibers, particles, and incompatible lubricants.
Prepare the Tube and Remake the SS Tee Connection Correctly
Confirm the tube outside diameter and wall thickness against the tee manufacturer’s specification before cutting. A wrong wall thickness can leave the ferrules unable to grip correctly, creating a leak that further tightening will not fix.
1. Cut the tube square with a suitable tube cutter or saw. Remove inside and outside burrs, clean the tube end, and remove scratches or damaged material from the sealing and ferrule-bite area.
2. Cut back to sound tubing if that area is scored, cracked, corroded, or ovalised. Do not conceal defective tubing beneath a new tee; the damage can prevent sealing and promote fatigue failure.
3. Insert the tube fully against the fitting shoulder, then keep it naturally aligned and adequately supported. Never pull a misaligned tube into position by tightening the nut. The resulting bending load can damage the fitting and cause fatigue cracking.
4. Reuse ferrules only when the manufacturer’s documented remake procedure permits reuse and the ferrules remain correctly positioned and undamaged. Replace any ferrule that is cracked, distorted, displaced, or marked by incorrect installation.
5. Use the specified tightening method, such as a measured wrench-turn procedure, instead of tightening until the joint feels tight. Repeated tightening can deform the joint and make a proper SS tee connection repair impossible.
Apply PTFE tape or sealant only to an intended tapered male pipe thread. Keep it off the tube, ferrules, and compression-nut threads unless the product instructions expressly require it.
Leak-Test the Joint and Return the Circuit to Service
The repaired tee is ready only after the connection passes a suitable leak test and the installation record is complete. Good stainless steel tee care ends with controlled verification, not with a nut that merely feels tight.
1. Confirm every tube is fully inserted against its fitting shoulder. Check that each nut was tightened by the approved manufacturer’s method and that the tubing is supported without side load or forced alignment.
2. Follow the site’s gas-release and detector requirements before introducing pressure, especially for hazardous gases. Raise pressure in a controlled sequence, then inspect the tee body, ferrules, threads, nuts, and adjacent tubing.
3. Use an approved leak-detection fluid when it suits the gas and test pressure; it can reveal many external leaks. Use an instrumented pressure-decay test when you need to measure pressure loss across a defined, isolated section.
4. Do not treat bubble testing as proof that the internal passage is clean, correctly oriented, or free from restriction. Never use an open flame to find a combustible-gas leak. Hold the test for the period specified by the system procedure.
If leakage continues, isolate and depressurise the section before investigating; never tighten a pressurised nut. Record the service, isolation date, fitting and tube material, size, repair reason, ferrule or tube replacement, installation method, test method, and result before returning the circuit to service.
Verify the Replacement Against the System and Supplier Documents
Do not order a replacement by the word “tee” alone. Match the manufacturer’s drawing to the installed port arrangement and confirm:
- Tube outside diameter and wall thickness
- Fitting series, thread form, and adapters
- Pressure rating across the operating temperature range
- Stainless-steel grade and any temperature derating
- Whether “OW” means one-way, offset, or a proprietary configuration
Check compatibility against the complete gas or fluid composition, moisture level, contaminants, pressure, temperature, and cleaning condition. 316 or 316L stainless steel is not automatically suitable for chloride-bearing service, hydrogen sulfide, ammonia, or oxygen. Oxygen service also requires documented cleanliness controls that exclude hydrocarbons, fibers, particles, and incompatible lubricants.
Treat pressure capability as an assembly limit, not a tee-body rating. Tubing size and wall thickness, tee design, threads, adapters, temperature derating, and the weakest connected component determine the usable limit.
Ask the supplier for heat or lot traceability, material certificates where required, applicable cleanliness certification, and installation and remake instructions. Record the service, isolation date, materials, size, drawing reference, repair reason, leak-test method, result, and replaced parts.
If searching for a tube fitting manufacturer ss ow tee for maintenance, send the marked tube size, service, pressure, temperature, material, and drawing reference. Mangalsai Technologies Pvt Ltd can be considered alongside a tube fitting manufacturer in Pune, but location never replaces verification.
Related product
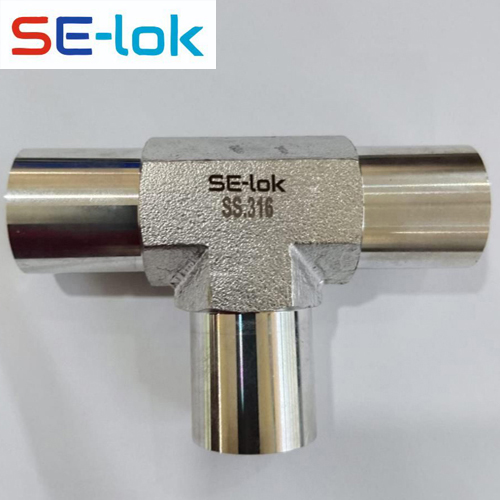 | SS Fitting Sai Engineering is a leading SS OW Tee Manufacturer and Supplier in Pune, India, offering high-quality Stainless Steel OW Tee (One-Way Tee) Tube... View product → |
Frequently asked questions
How do you identify an SS OW tee before maintenance?
Check the manufacturer’s drawing for the tee designation, port arrangement, tube outside diameters, wall thickness, thread form, flow arrows, and connected components. Do not infer flow from the external shape.
What steps come before removing an SS tee connection?
Isolate the circuit, lock out the relevant valves, depressurise the complete connection, and verify zero pressure with the approved gauge or measurement method. Clean the fitting and inspect tubes, nuts, ferrules, threads, and seals.
How do you remake an SS tee connection correctly?
Prepare a clean, square tube end by cutting and deburring it. Insert the tube fully into the tee, keep the tube aligned, and tighten the fitting according to the manufacturer’s documented installation procedure.
How should you test an SS OW tee after repair?
Perform a controlled leak test using the system’s approved test medium and pressure. Inspect each joint, increase pressure in planned steps, and return the circuit to service only after the connection remains leak-free.
What documents should you verify before replacing an SS OW tee?
Compare the replacement with the manufacturer’s drawing, part number, material specification, tube size, pressure rating, temperature range, thread form, flow direction, and installation instructions.